How to move the taskbar on the left in Windows 11
How to put the taskbar on the left in Windows 11
If you are using Windows 11 or have switched from Windows 10, you must have noticed that the taskbar is now at the bottom, but the change here is that it is in the middle.
This is a deviation from all previous versions of Windows, and you may not like it. However, there is good news! Windows 11 offers the ability to align the taskbar to the bottom left, right, or center, depending on your preference. So, don’t hesitate to make a change and take control of your taskbar alignment today!
How to put Taskbar Icons to Bottom Left in Windows 11
If the default placement of the Windows 11 taskbar isn’t quite what you’re looking for, fear not! You can quickly move it to the left side along the bottom of your screen. Although you can’t place it on the left side of the screen, this shouldn’t be a problem.
You will find that the process is very easy and can be done in just a few simple steps. Follow these steps confidently, and you’ll have your taskbar exactly where you want it in no time!
- Go to an empty area in the taskbar and right-click

right-click -
- Choose (taskbar settings)

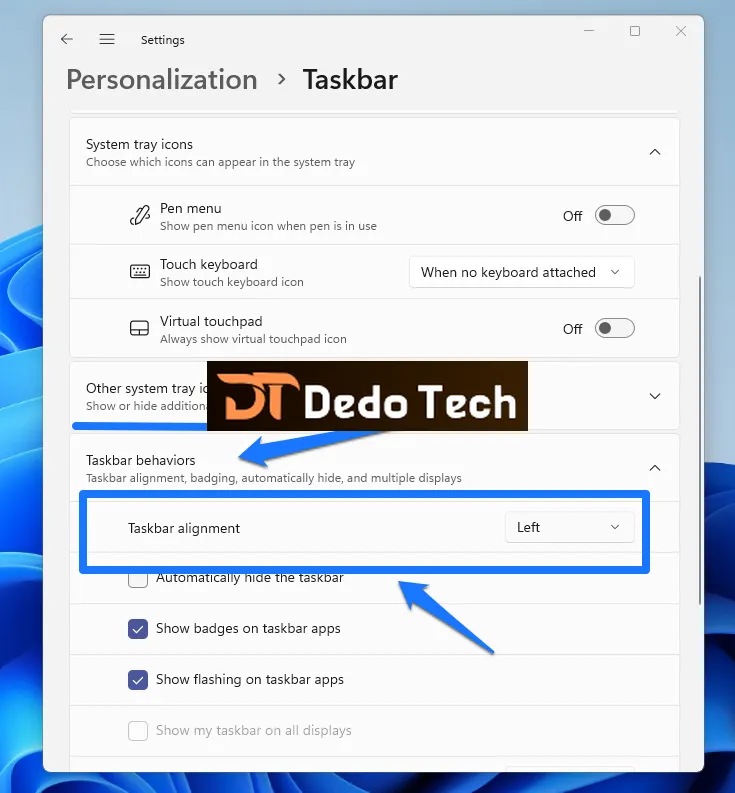
taskbar settings - From this new window, choose “Taskbar Behaviors”

Taskbar Behaviors - Select the “Align Taskbar” option.

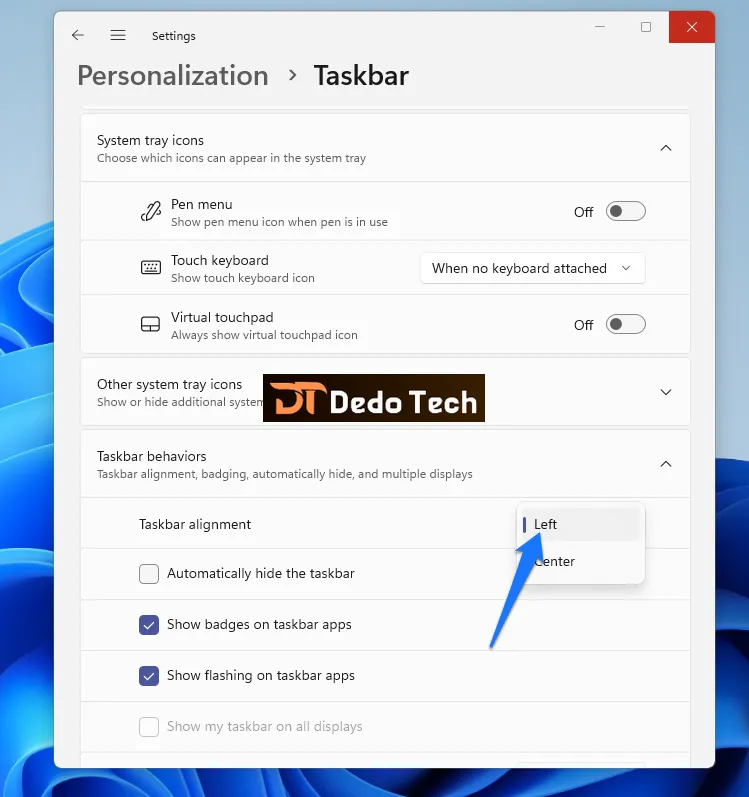
- From this menu, choose (Left).

choose (Left)


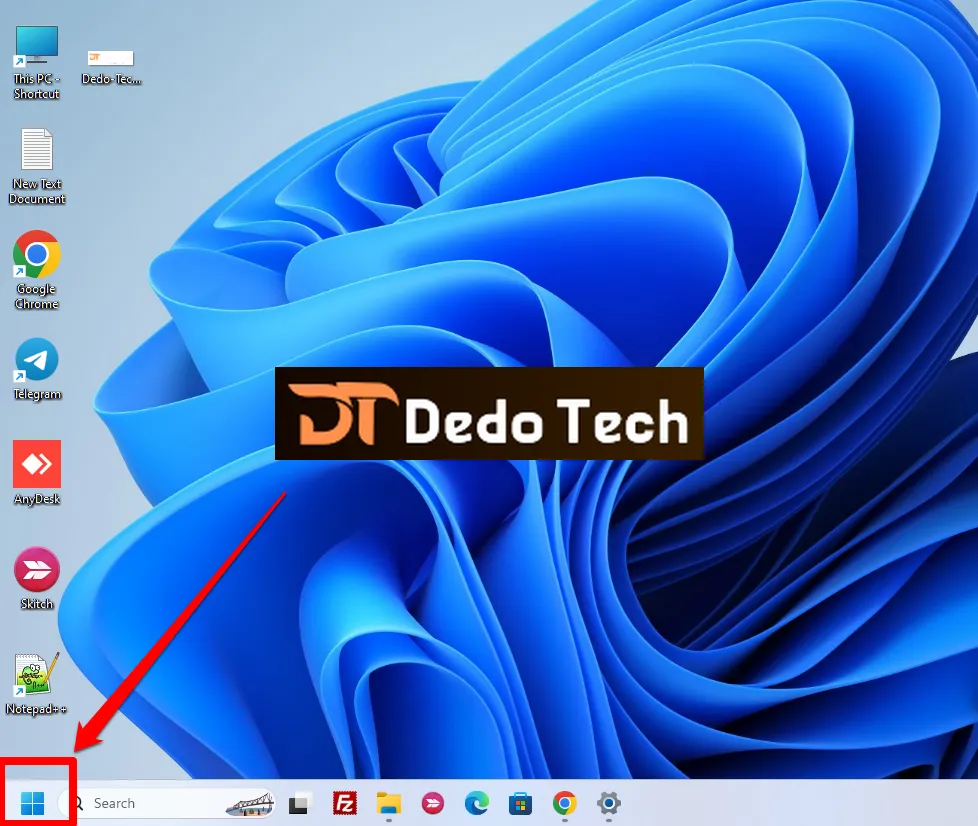
The taskbar will automatically move to the left, and the Start menu will appear in front of you on the left.
To adjust the position of the toolbar through Settings from the Start menu, follow these steps:
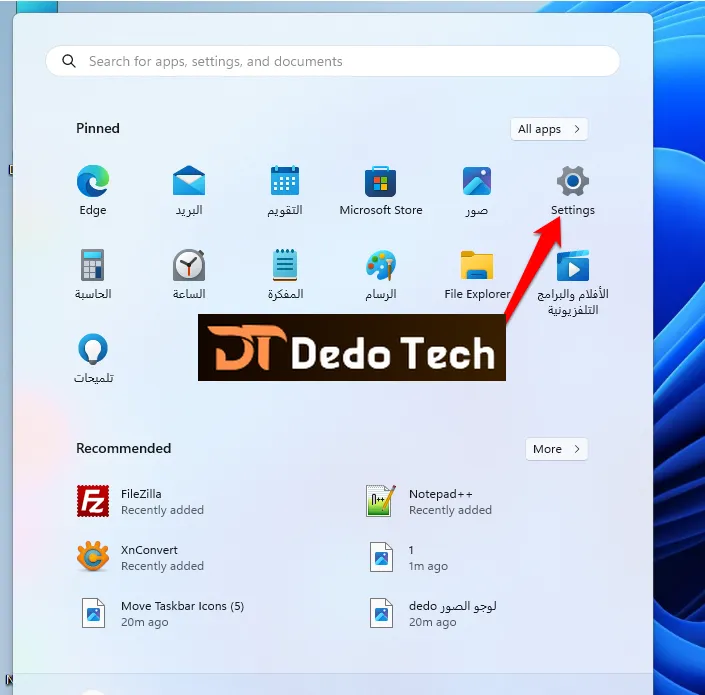
- Click the Start button at the screen’s bottom left.

Start - Tap the “Settings” icon that looks like a gear.

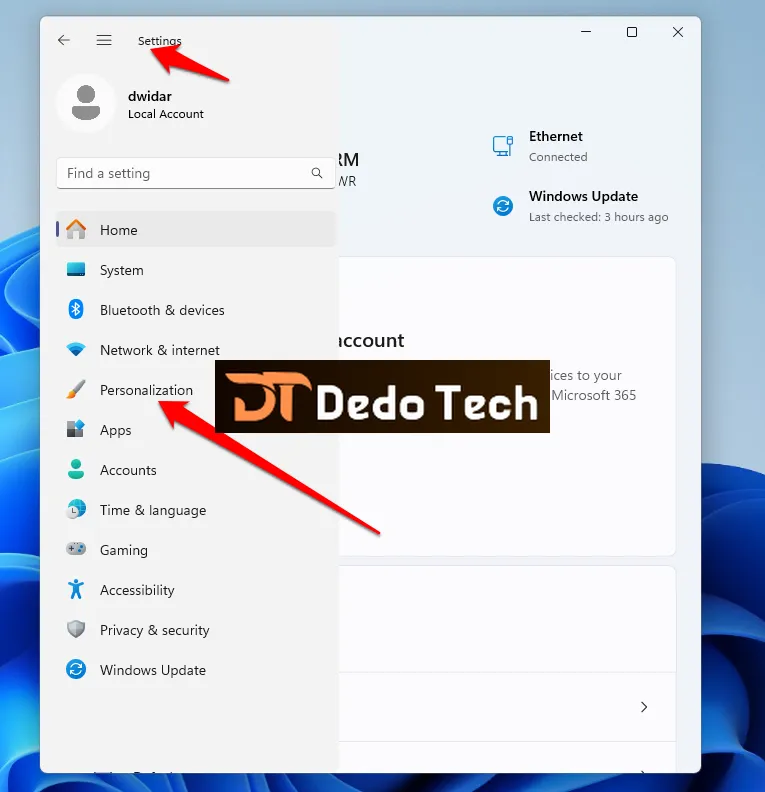
Settings - Click on the “Personalization” option in the Settings window.

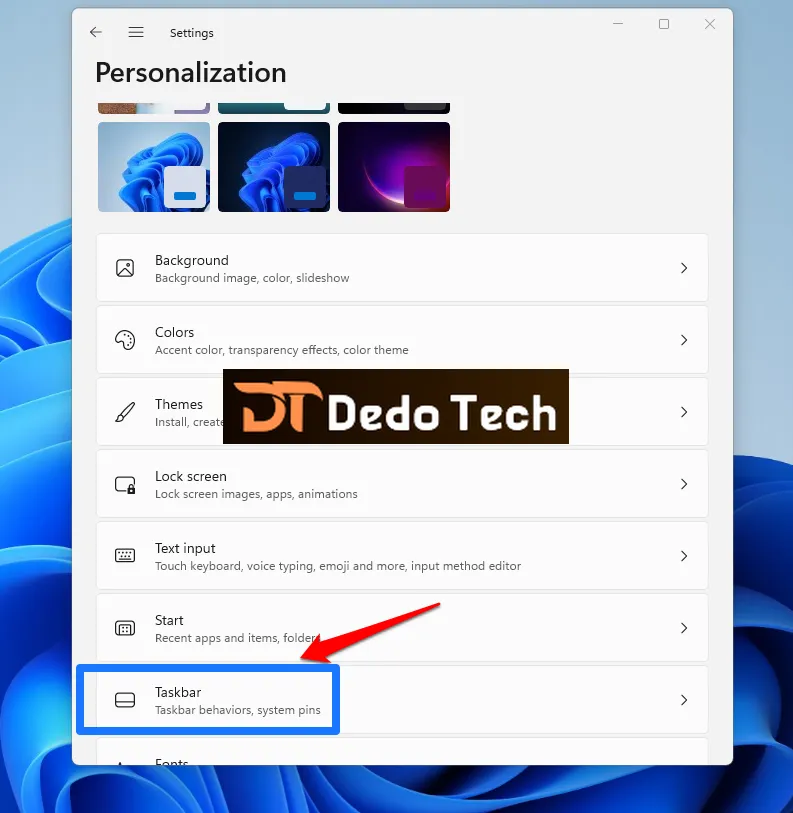
- From the left menu, click Taskbar.

- Click Taskbar Behaviors, then Taskbar Alignment.

- Select “Left” and exit Settings to finish.

I understand that the taskbar can be a crucial tool for your work. That’s why it’s good to know that it can be easily moved to the left side of the screen if that’s more comfortable for you. And don’t worry, if you ever change your mind, you can always switch it back to the center with just a few clicks.
Quick settings:
First, right-click on an empty area in the taskbar and select “Taskbar settings.” Then, choose “Taskbar behaviors” and select “Align Taskbar.” Finally, choose “Left” and your taskbar will instantly move to the left side of your screen. It’s that easy! And if you ever want to switch back, simply choose “Center” instead of “Left” from the “Taskbar behaviors” menu.
How to Pin Taskbar Apps in Windows 11
If you are looking to save time and become more efficient, you can choose which Windows 11 apps to pin to your taskbar. Pinning an app to your taskbar in Windows 11 is a simple process, and here’s how you can do it:
1. Click on the Start button on your desktop.
2. Select the “All Apps” option.
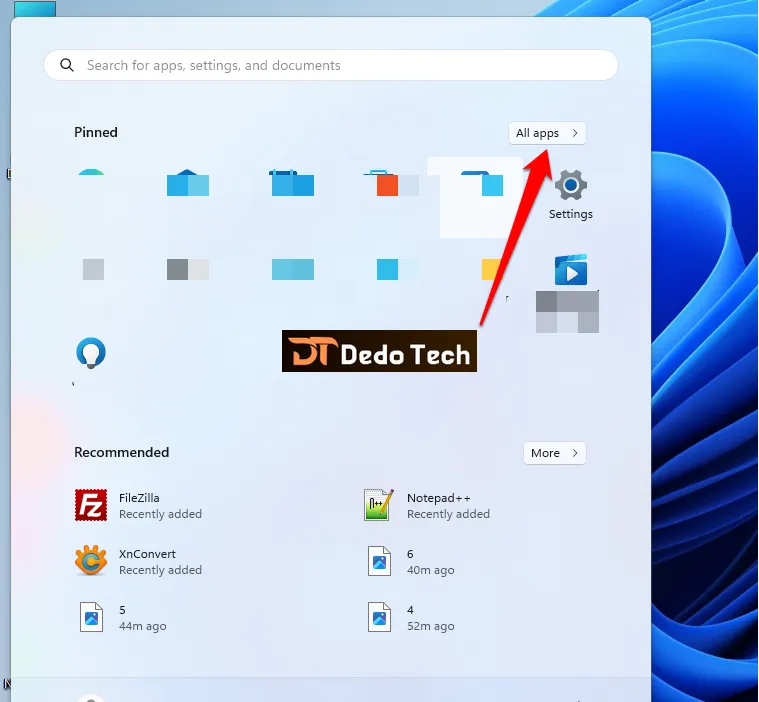
3. Right-click on the app you want to pin and select “Pin to taskbar” from the menu that appears.
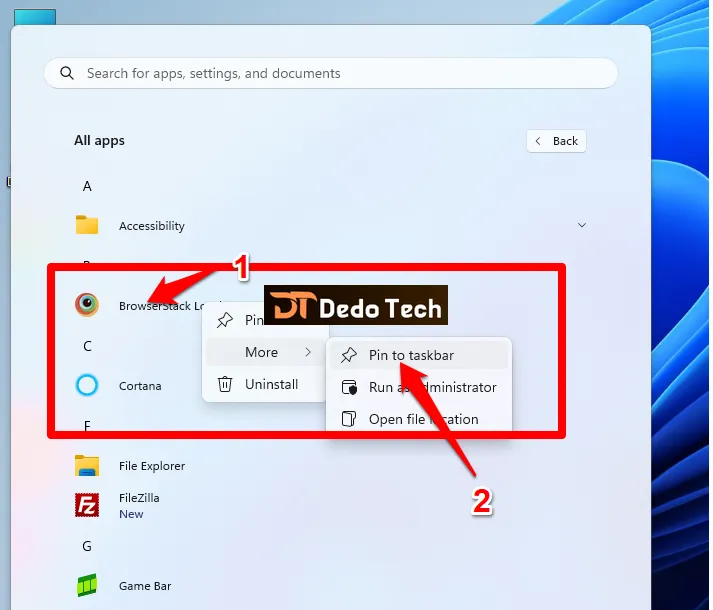
To make it easier to access your favorite apps, you can right-click on the app desktop shortcut and select “Pin to taskbar.” This will add the app to your taskbar, allowing you to launch it with just one click. It’s a convenient way to save time and stay organized.
Shortcut: This shortcut is faster than any of the steps we have explained above and involves just one step through which you can pin any application to the taskbar by dragging and dropping.
How to Hide Taskbar in Windows 11
It can be frustrating when you’re working on a smaller laptop and need all the desktop space you can get. Luckily, in Windows 11, you can easily hide the taskbar by hovering over the area and it will disappear while still staying “invisible”. To bring it back up, simply hover over the area again or press the Win key on your keyboard. This handy trick can help you maximize your workspace and get more done without any unnecessary distractions.
Steps to hide the taskbar in Windows 11:
- Hover your mouse over the taskbar at the bottom of the screen.
- Right-click on the taskbar.

- Click on “Taskbar settings” from the drop-down menu.

- Scroll down to the “Taskbar behaviors” section.
- Toggle on the switch next to the “Automatically hide the taskbar” in desktop mode” option.

- The taskbar will now disappear when you’re not using it.
- To bring it back up, simply hover over the area again or press the Win key on your keyboard.
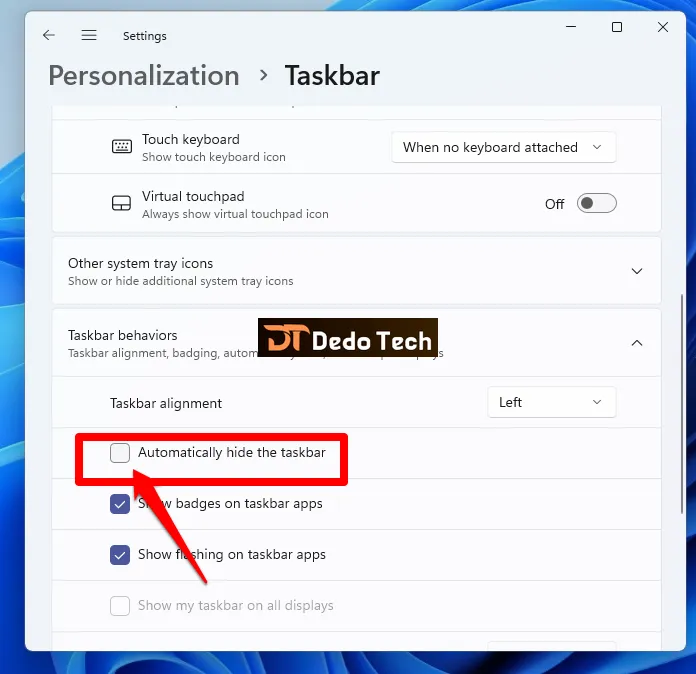
Sometimes, you might need a little extra desktop space to get things done. One way to do this is by hiding the taskbar. You can easily accomplish this by unchecking the “Automatically hide the taskbar” box. And if you ever want to bring it back, simply check the box again.
conclusion:
- I am glad to have been able to assist you in learning how to easily place your taskbar at the bottom left in Windows 11. This change can certainly make your system interface more organized and make it easier for you to access your applications and tasks. Just by following the simple steps I provided, you can achieve this in no time. And if you ever want to change the location of your taskbar again, you can easily customize it to fit your preferences. Windows 11 gives you the flexibility to personalize your user interface to meet your unique needs.
- I truly hope that these detailed instructions have been helpful in improving your experience with Windows 11. Feel free to continue exploring all of the amazing features that this new system has to offer. It is my pleasure to assist you in any way I can to make working on your computer smoother and more efficient.
Don’t forget to support us in the comments. It means a lot to us to hear your thoughts and feedback. Your support helps us improve and create better content for you. Thank you in advance!